Design an interactive App (no coding required)

While researching the requirements for Multi-Factor authentication I realized there is a lot of information provided by Salesforce on this or many other subjects. Then I ask to myself ... It is possible to have a lot of information accessible in an easy and practical way? What if I want to share that set of information quickly for any individual using a mobile phone? Then I decided to create an Interactive virtual application using Adobe XD. I normally use this tool to create mockups of mobile apps and I share them with other team members.
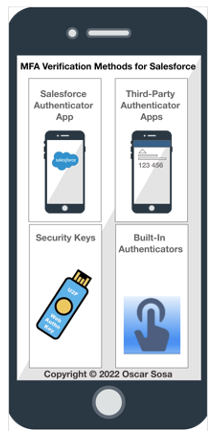
This time I am creating a Multi-Factor Authentication Methods for Salesforce.
The first step is to gather all source documents with the information that you want to share in the app.

Normally these are text documents for example in my case I wanted to make an app that informs on Multi Factor authentication methods available for Salesforce orgs in accordance with new compliance requirements for Salesforce customers effective in February 2022.
See MFA Quick Guide for Admins (Pages 6-11)
After having all documents ready it is time to download Adobe XD. There is a free trial that you can use.
If you are not familiar with Adobe XD, it would be a good idea to watch this video:
Plan the user interface
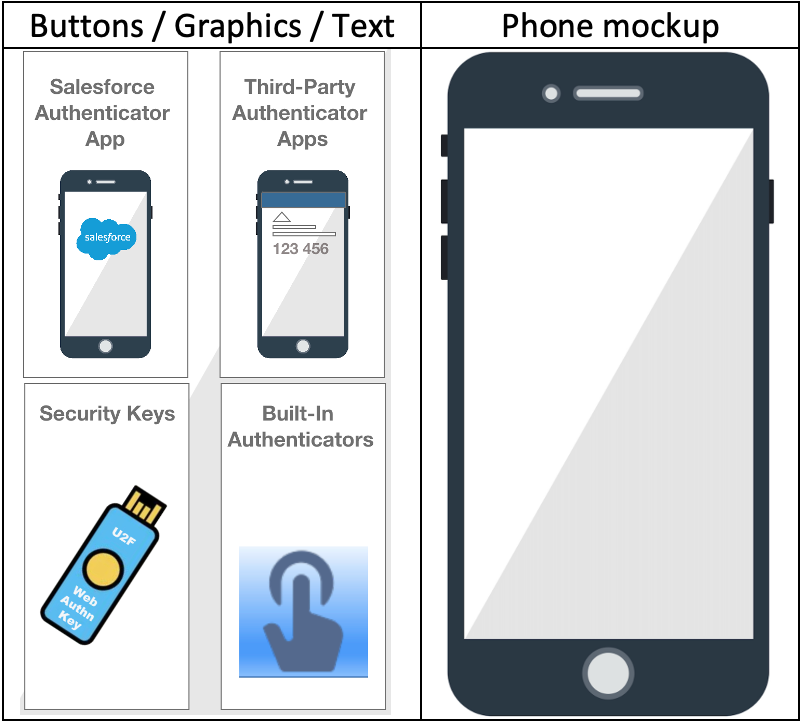
I decided to create four giant buttons for the main page. Also found graphics for each one and the background phone mockup.
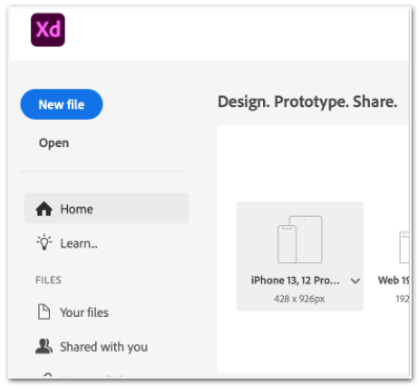
Open Adobe XD and select the Phone template
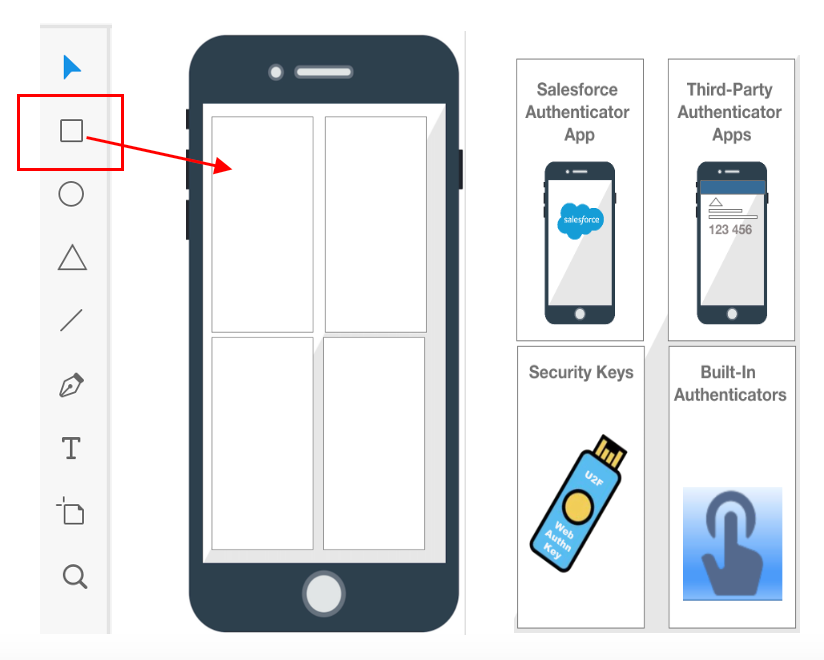
Drag your graphic from your desktop to the canvas and stretch it out to cover the entire rectangle using the nodes in the corner of the image.
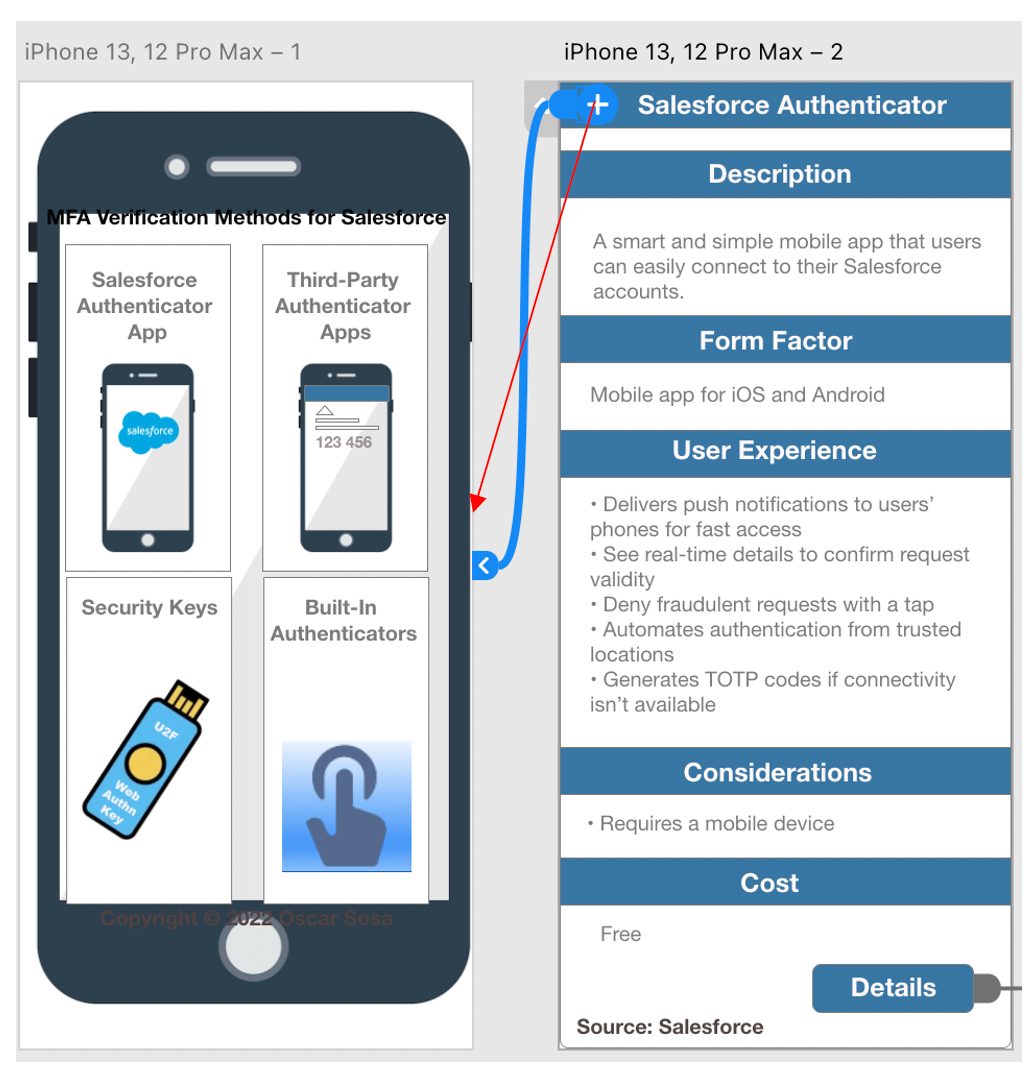
Use the rectangle shape form the toolbar on the left of your screen and create four buttons. Drag icons and type text as shown on the image.
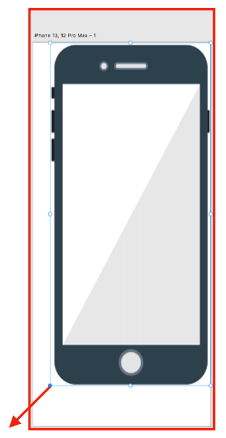
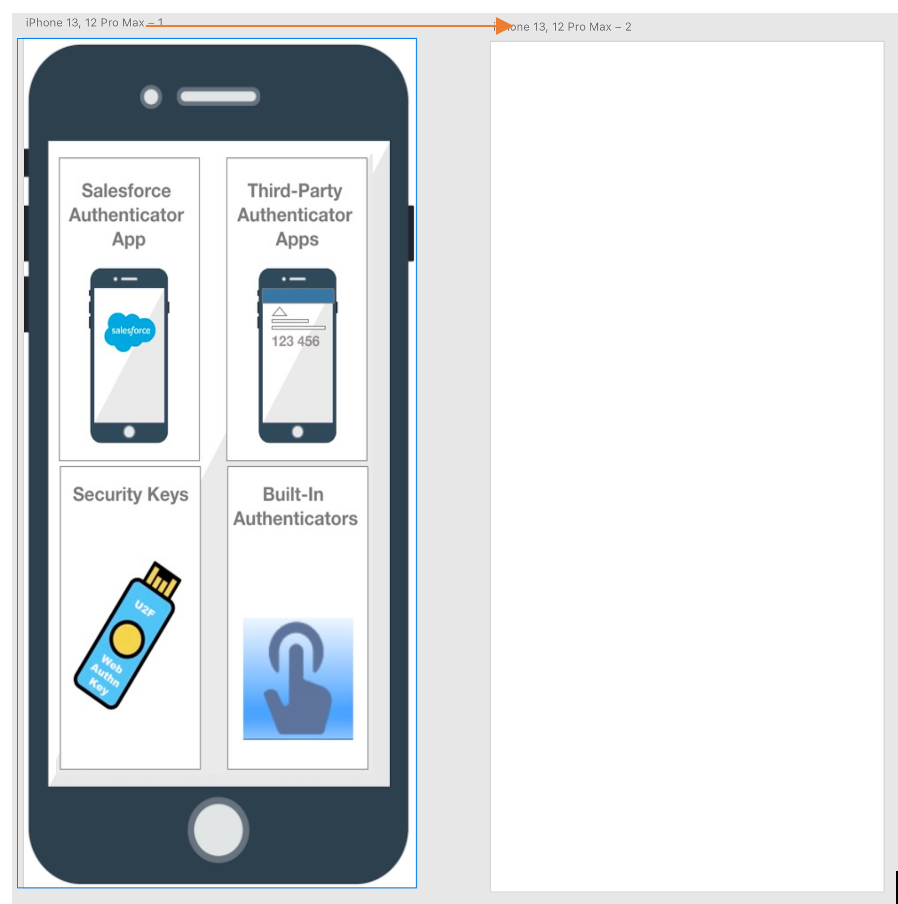
Now it is time to create a content page. The goal on this step is to have a blank canvas in addition to the one we just created. Press the Option+Drag (ALT+Drag on Windows) to duplicate your page, then delete all shapes until you have a blank canvas as shown below.
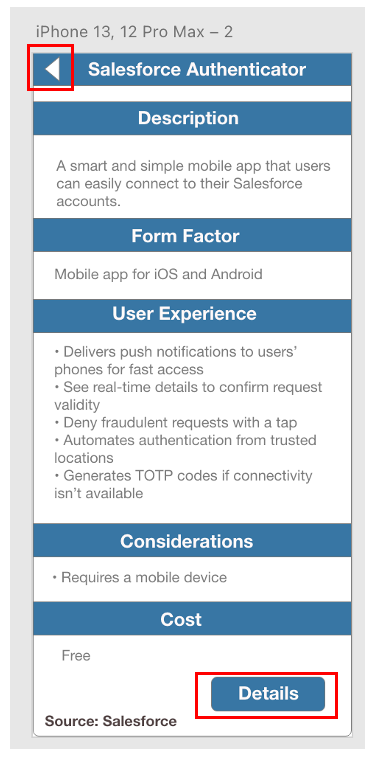
Now design headers and content based on your source document. Include Arrows and Buttons for navigation as individual objects.
Now this is the fun part!. Create navigation. Switch your menu to Prototype.

Connect the main buttons to the correspondent Content Page by selecting an object and dragging connector to another object. In this case we are connecting the first rectangle to the new screen. Note: You may want to group all objects inside the rectangle by selecting the text, Icon and rectangle, right click on selection and Group.
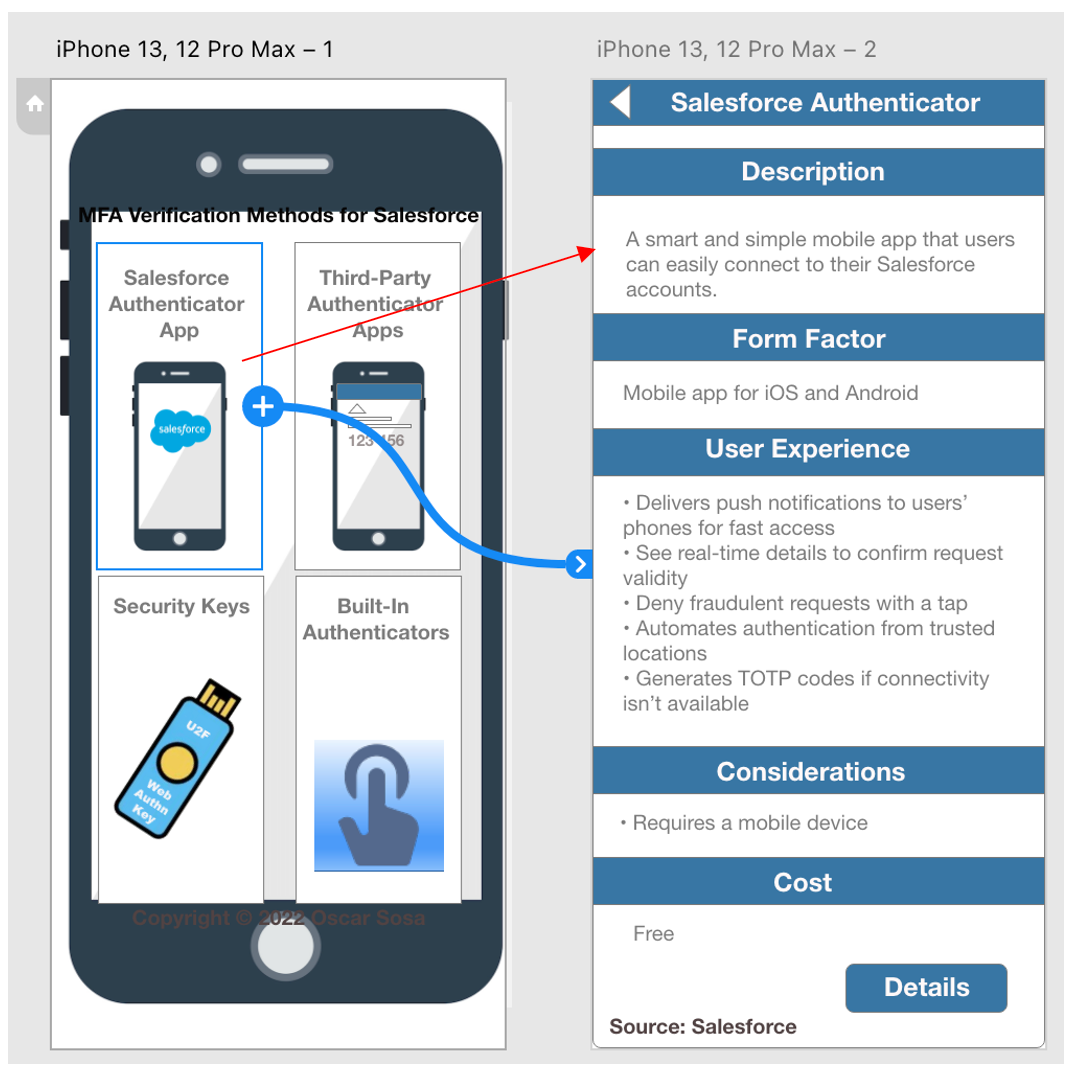
Also make the arrow from the content page to point to the main page. Todo this select the triangle object on the header and connect it t0 the main page.
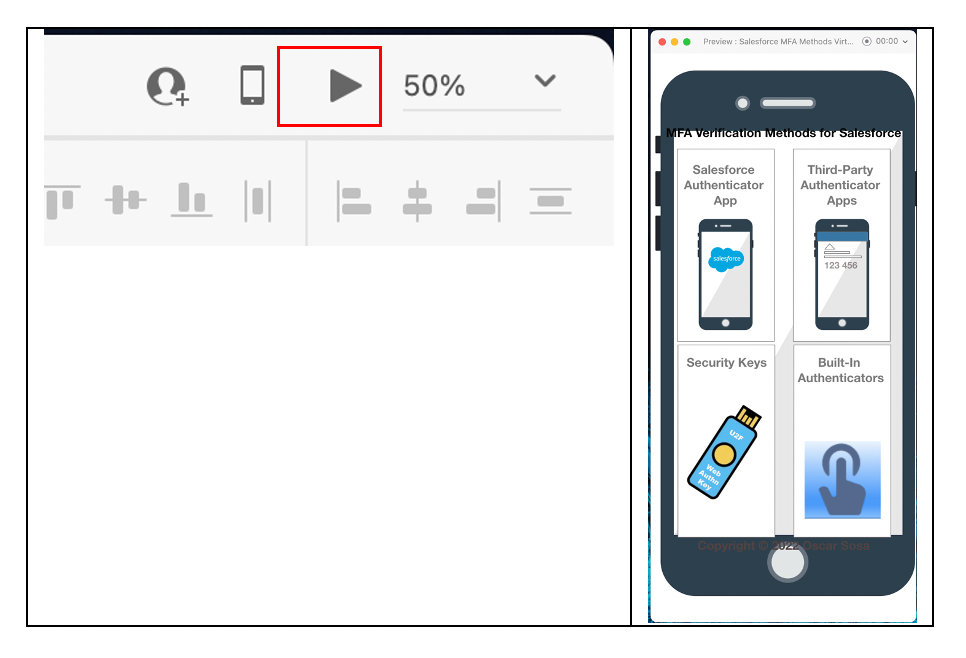
You are done with the first page Congratulations!. Now start testing this page by previewing the app and checking the navigation from button to content page and vice versa. Use preview button on top of the screen.
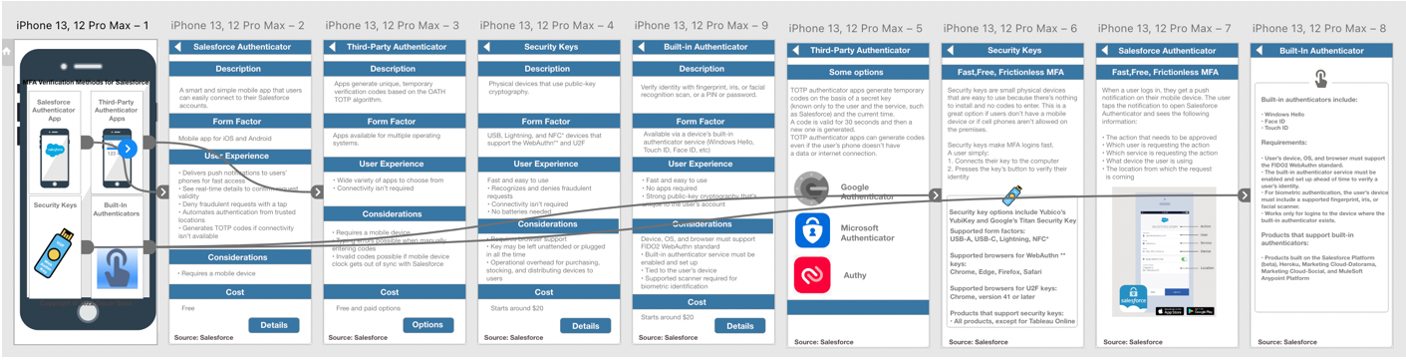
Make all necessary pages for all buttons. My suggestion is do one page and test it. Then move to the next page.
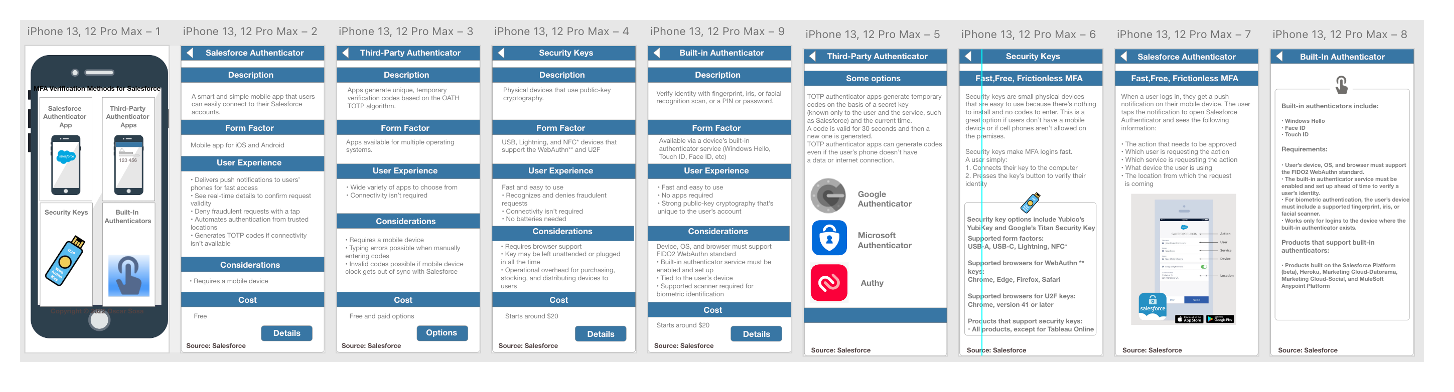
Verify all your navigation links from main screen to all content pages. Dont forget to test navigation from content pages back to main page.
You finished! Congrats

Now the last step is... Share it with the world!
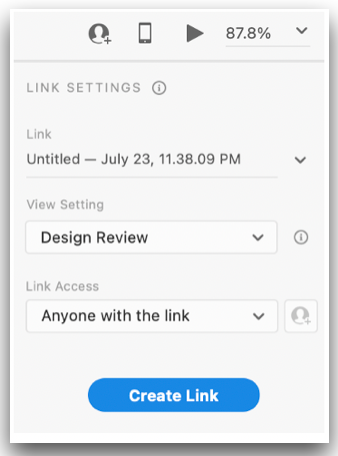
Chick on the Share option from the menu.

Then create a shareable link to your app.
Congratulations! You are done.
Note: If you have any questions about this tutorial contact me in LinkedIn. Thank you for your time. Oscar.